KineMaster as a Powerful Video Trimmer for Quick and Easy Edits
KineMaster as a Powerful Video Trimmer is a fantastic video editing app used by millions to create professional-looking videos with minimal effort. One of its standout features is the ability to trim and cut videos perfectly. Whether you want to remove unnecessary clips, fix mistakes, or fine-tune your project for social media, KineMaster’s video trimmer tool makes it easy. In this guide, you’ll learn how to trim videos, discover pro tips to enhance your edits, and explore how KineMaster can help you create high-quality content.
Let’s dive in and see how KineMaster’s trimming tool can help you edit videos like a pro, even if you’re just getting started!
What Makes KineMaster as a Powerful Video Trimmer?
KineMaster as a Powerful Video Trimmer feature is one of the most user-friendly tools for video creators. You don’t need advanced editing skills to trim and cut clips accurately. Whether you’re creating content for YouTube, TikTok, or a class project, KineMaster makes it easy to remove unwanted sections and keep only the parts that matter.
Top Reasons to Use KineMaster for Trimming:
- Easy to Use: The trimming tool is simple and ideal for beginners.
- Precision Control: You can cut out specific parts of a video with high accuracy.
- Multiple Layers: Trim multiple clips on different layers at the same time.
- Perfect for Short-Form Content: Ideal for Instagram Reels, TikToks, and Stories.
- Fast Export: Quickly export your trimmed videos in high quality, up to 4K.
Whether you’re editing travel vlogs, school assignments, or social media videos, KineMaster’s trimming feature gives you complete control over your clips.
Step-by-Step Guide: How to Trim Videos on KineMaster
Here’s an easy guide to help you trim videos on KineMaster quickly:

Step 1: Download and Install KineMaster
You can download KineMaster from the Google Play Store or Apple App Store. If you prefer working on a bigger screen, you can also use KineMaster on a PC through an emulator like BlueStacks.
Step 2: Start a New Project
- Open KineMaster and tap “Create New Project.”
- Choose the aspect ratio that fits your video (16:9 for YouTube, 9:16 for Instagram Stories).
Step 3: Import Your Video Clip
Browse your phone’s gallery and select the video you want to trim. Once it’s on the timeline, it’s ready for editing.
Step 4: Trim or Split Your Clip
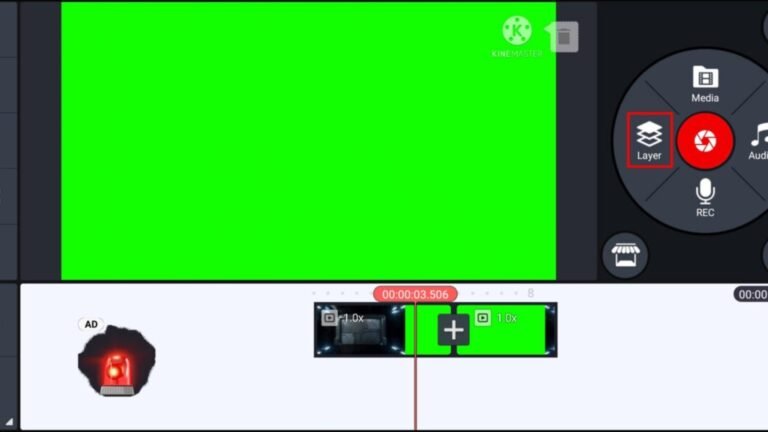
- Tap the video clip on the timeline to activate the editing tools.
- Drag the yellow handles at the beginning or end of the clip to remove unwanted parts.
- To cut from the middle, tap the clip, select “Split,” and delete the unwanted section.
Step 5: Preview Your Trimmed Clip
After trimming, tap the play button to preview your work. Make sure everything looks smooth and polished.
Step 6: Add Transitions (Optional)
If you split the video into multiple clips, you can add transitions between them. KineMaster offers lots of fun effects like fades, slides, and zooms.
Step 7: Export Your Video
Once your video is trimmed and ready, tap “Export” and select the resolution. If you’re using the free version, your video will have a watermark. Upgrade to KineMaster Pro to remove it.
Tips for Trimming Videos in KineMaster
Here are some pro tips to make your trimming experience smoother and better:
1. Plan Before You Trim
Watch the entire clip first and note the sections you want to keep. This will make the trimming process faster.
2. Use Split for More Control
Instead of just dragging the handles, split the clip into smaller pieces. This way, you can rearrange or remove parts easily.
3. Zoom into the Timeline
Zooming in on the timeline helps you trim with more precision. This is especially useful when working on short clips.
4. Don’t Over-Trim
Be careful not to trim too much. Leave a little extra footage so you can adjust later if needed.
5. Use Transitions for Smooth Cuts
If the cut between two clips feels too abrupt, add a transition effect to make the switch smoother.
6. Try Different Aspect Ratios
When editing for social media, trim your videos to fit the platform. For example, use 9:16 for TikTok and 1:1 for Instagram posts.
7. Use Undo If Needed
If you accidentally trim too much, use the undo button to restore the clip.
Benefits of Using KineMaster for Video Trimming
KineMaster as a Powerful Video Trimmer offers many benefits that make it a perfect choice for video trimming:
- Beginner-Friendly: Easy to use, even if you’re new to video editing.
- Works on All Devices: Use it on Android, iOS, or a PC emulator.
- High-Quality Exports: Export trimmed videos in 720p, 1080p, or even 4K.
- Pro Tools Available: Access more tools and effects with KineMaster Pro.
- Great for Short-Form Content: Perfect for TikToks, Reels, and YouTube Shorts.
Free vs. Pro: Which One Should You Use?
KineMaster offers both a free version and a Pro version. Here’s a quick comparison:
| Feature | Free Version | Pro Version |
| Watermark | Yes | No |
| Trimming | Yes | Yes |
| Export Quality | Up to 720p | Up to 4K |
| Access to Effects | Limited | Full Access |
If you want no watermarks and better effects, it’s worth upgrading to KineMaster Pro.
Conclusion
KineMaster as a Powerful Video Trimmer is an excellent tool for trimming and cutting videos quickly and easily. Its user-friendly interface makes it a great choice for beginners and advanced users alike. Whether you’re making YouTube videos, Instagram Reels, or school projects, KineMaster helps you remove unwanted parts and create smooth, polished videos. With helpful features like multiple layers, transitions, and 4K exports, you can make professional-looking content in no time.
So, what are you waiting for? Download KineMaster today and start trimming your videos like a pro.
FAQs
1. Is KineMaster free to use?
Yes, but the free version adds a watermark to your videos.
2. Can I trim videos on KineMaster without upgrading?
Yes, the trimming tool is available in the free version.
3. Does KineMaster as a Powerful Video Trimmer work on PC?
Yes, you can use it on PC with an emulator like BlueStacks.
4. Can I export videos in 4K with KineMaster?
Yes, but only with the Pro version.
5. How do I split a video in KineMaster?
Tap the clip on the timeline, select “Split,” and cut the video at the desired point.
6. Can I add transitions after trimming?
Yes, you can add transitions between clips for a smoother flow.
7. Is it easy to trim videos on KineMaster?
Yes, the interface is simple and beginner-friendly.
8. Does KineMaster support multiple layers?
Yes, you can add and trim multiple layers of videos, audio, and text.
9. How much does KineMaster Pro cost?
It offers monthly and yearly subscription plans.
10. Is KineMaster good for short-form content?
Absolutely! It’s perfect for Instagram Reels, TikToks, and YouTube Shorts.

